SMARTTECH3D and Verisurf have announced the commencement of an international cooperation.
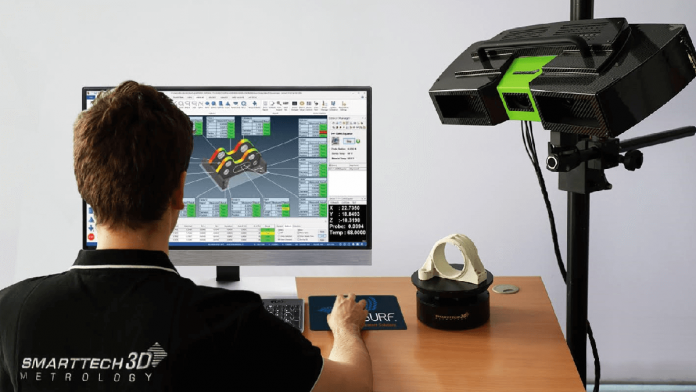
Devices and software of SMARTTECH3D will be accompanied by the Verisurf application suite that makes it possible to perform the full process of quality control and reverse engineering. What is more, SMARTTTECH3D will be responsible for the software installation, training, and technical support of this advanced system.
“Our high-resolution structural light scanners are focused on collecting precise geometry and color data. When it comes to processing and analyzing that data, we feel Verisurf provides the most comprehensive set of applications, all of which are based on a powerful CAD platform. This is both unique and extremely customer-focused,” said Anna Gebarska, Managing Director of SMARTTECH3D.
A combination of high-class metrologically verified 3D scanners with Verisurf software will help users to work efficiently with gathered data to quickly and precisely check every part of a manufactured product during the manufacturing process straight on the production line. This is a perfect way to avoid any unnecessary complications and optimize the cost of production. Thanks to this complex solution every part that leaves the factory is uniform and free of errors.
“Capturing good data is paramount to all application processing that follows. At Verisurf we pride ourselves in being able to apply measurement data effectively to inspection and reporting, reverse engineering, and assembly guidance applications. Our Solution Partnership with SMARTTECH3D provides customers, worldwide, with best-in-class scanning solutions that are easy to use and based on an open CAD platform,” said Ernie Husted, President, and CEO of Verisurf Software, Inc.
SMARTTECH & Verisurf SUITE software includes 3 modules: CAD, ANALYSIS, and REVERSE modules. The suite is available in educational and commercial versions.
CAD is at the foundation of all Verisurf applications and supports 3D wireframe modeling, 3D surface modeling, 3D solid modeling, and 2D drafting. Model-Based Definition (MBD) – includes ISO 10303 & ASME Y14.5 compliant 3D model associated GD&T creation and editing. TOOLS for model-based metrology including auto flip surface normals, auto hole axis finder, screenshot grabber, 3D-PDF, and more. Import files in ACIS, AutoCAD, Inventor, IGES, KeyCreator, Parasolid, Rhino, SolidEdge, SolidWorks, Spaceclaim, STEP, STL, VDA formats. Export files in ACIS, AutoCAD, IGES, Parasolid, STEP, STL, VDA file formats.
ANALYSIS module includes fast best fitting of measurements to 3D CAD model nominal. Analyze points-to-points, points-to-curves, points-to-surfaces, or points-to-meshes and communicate results with color deviation maps, whisker plots, custom ballooning, and reporting.
REVERSE is a set of powerful tools to reverse engineer scan data into fully closed mesh surface models ready for 3D Printing, Additive Manufacturing, and Solid Modeling. Imports, edits, and exports massive point clouds and STL meshes. Extensive mesh alignment, filtering, smoothing, mesh bridging, hole filling, edge extending, and trimming, and slicing. Create NURB surfaces by sketching or projecting curves onto mesh or with intelligent prismatic feature fitting and auto surfacing.

